Do you want to know how to add header and footer in MS Word? It’s actually a very simple process. The header and footer can be a great way to add branding to your documents or to include additional information such as the page number or the date. In this blog post, we will walk you through the steps involved in adding header and footer text to your document. We will also show you how to change the header and footer settings for different pages. Let’s get started!
Table of Contents
What is header and footer?
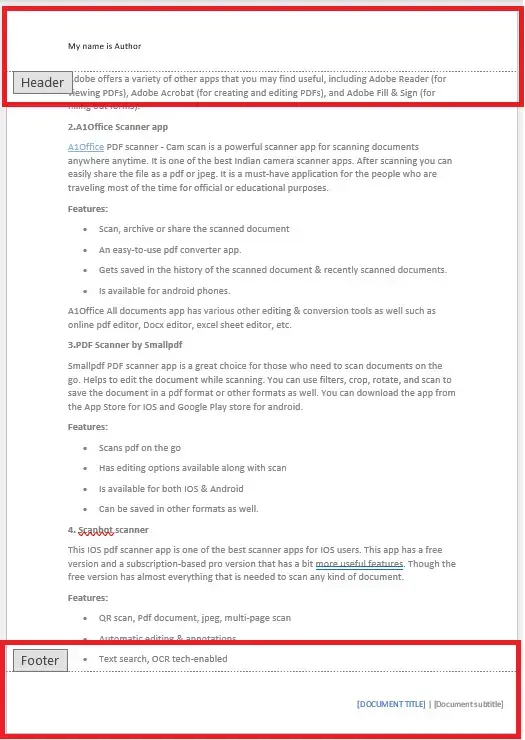
Headers and footers typically contain information such as the document title, author name, page number, and other relevant data. The header and footer are the two most important components of a document in Microsoft Word. They can be used to add variety to your document, and they can be essential for long documents that need to be divided into sections.
Headers usually appear at the top of a page, while footers usually appear at the bottom. However, you can set different headers and footers for odd and even pages, or any other combination you need. You can also insert graphic elements into your header or footer, such as company logos or images. Now you know what is header and footer in ms word lets step ahead.
Steps to add header and footer in ms word
Now that we know what is header and footer, let’s take a look at how to add them to your document.
Adding a header or footer is easy in MS Word through the following steps:
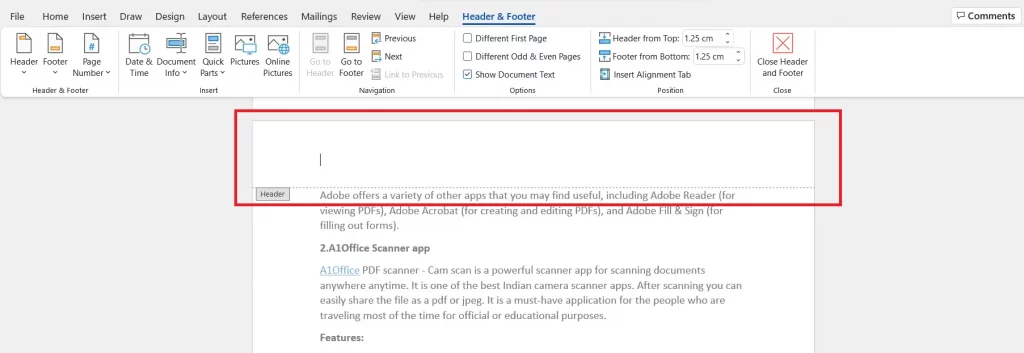
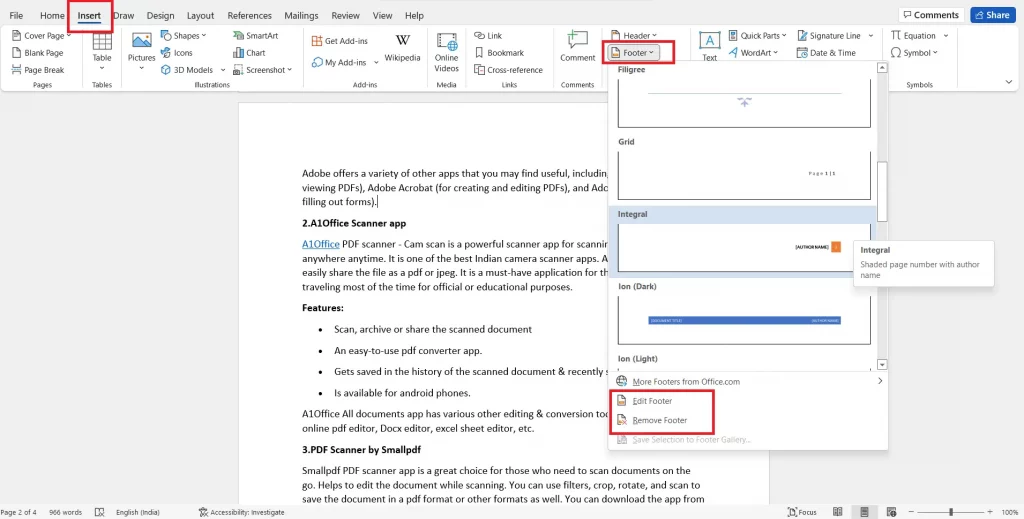
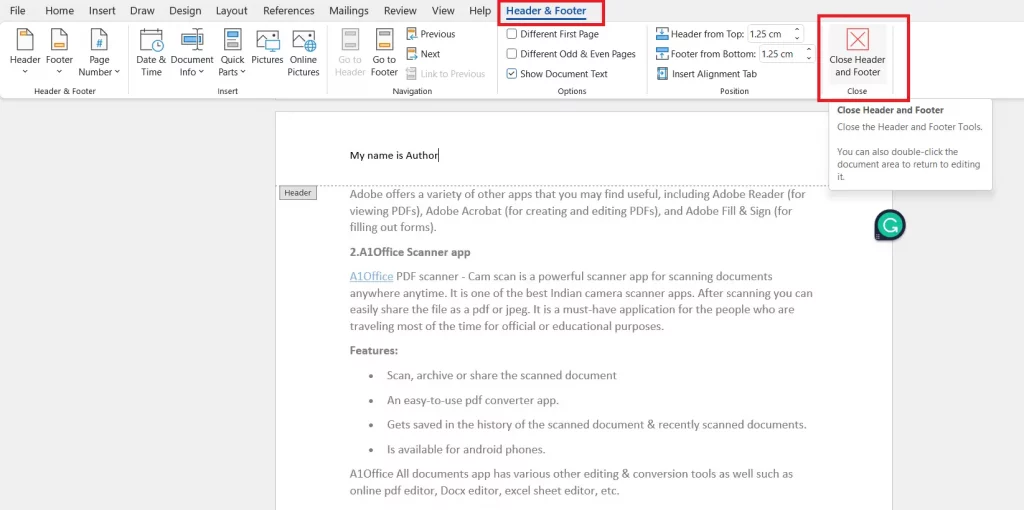
- Simply open the header or footer area by double-clicking on the top or bottom of the page. This will bring up the header or footer area, where you can enter your text.
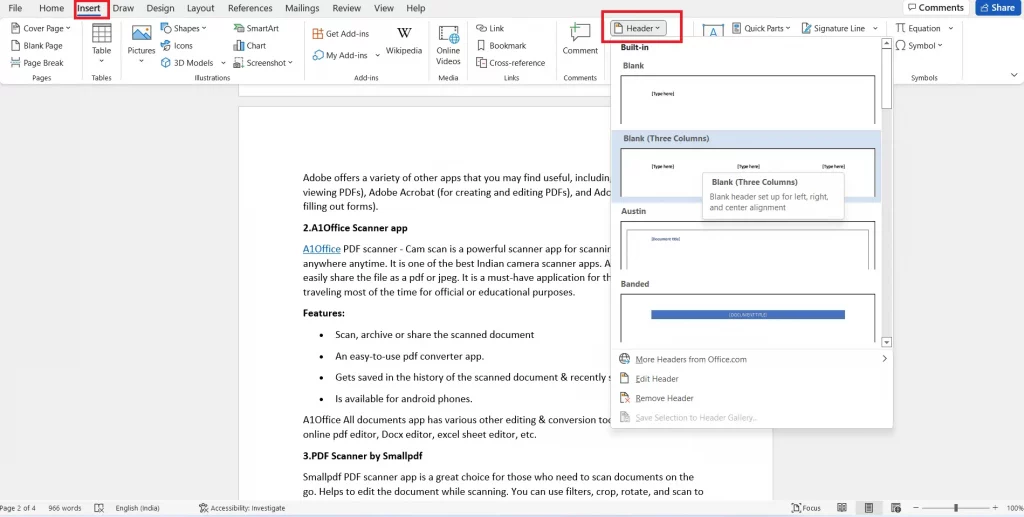
- You can also add a header and footer from the Insert tab on the Ribbon. Simply click on Header or Footer, and then choose the header or footer type you want to insert.
- Once you have inserted the header or footer, you can format it using the various options available in MS Word. For example, you can change the font, size, color, or alignment of the header or footer text. You can also insert graphic elements into the header or footer.
- When you are finished, simply close the header or footer area by clicking on the Close Header and Footer button on the Ribbon.
How to add header and footer in word using online Docx editors?
While editing doc/Docx files in ms word is not just a sole option left with users. You can now use the free online Docx editors such as A1Office Docx editor to add header and footer to your documents.
The header and footer can be easily added using the A1Office Docx editor by the following steps:
- Open dev.a1office.co and click on docx editor.
- Click on the create document button which will open a new word doc.
- Now you can create a new doc or open an existing one from the ‘open tab’ on the menu bar.
- Click on the ‘header’ option available on the top bar to add a header to your doc.
- Similarly choose the ‘footer’ option available on the top bar to add a footer.
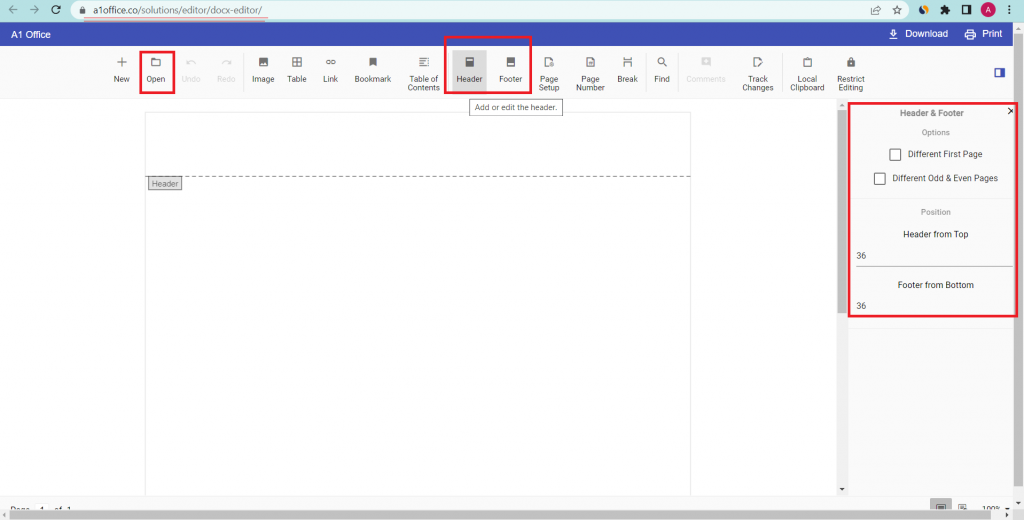
You can customize the way header and footers would appear on your document with the option available on the right-hand options panel viewed once you select header and footer options.
You can change different first page or odd-even pages features of the header and footer options. You can even customize the position of your header and footer from the top and bottom of the pages.
Conclusion:
Adding header and footer in ms word is an easy task to do. You can do it by following the simple steps mentioned in this blog post. You can also use online Docx editors to add header and footer to your documents. A good online Docx editor will offer you various customization options to make your header and footer look just the way you want them to. You can check out our other blog on “How to open and edit Docx File“.
We hope you found this blog post helpful. If you have any questions, please feel free to leave a comment below. Thanks for reading!


